How to Enter a Loan Into Quickbooks
Contents
- Open Quickbooks and go to the Company menu
- Select Make General Journal Entries
- Enter the date of the loan in the Date field
- In the first line of the journal entry, select the Accounts Receivable account from the Account drop-down menu
- Enter the amount of the loan in the Debit column
- In the second line of the journal entry, select the appropriate income account from the Account drop-down menu
- Enter the amount of the loan in the Credit column
- Click Save & Close
You can quickly and easily enter a loan into Quickbooks by following these simple steps.
Checkout this video:
Open Quickbooks and go to the Company menu. Select “Add a New Account.” Choose “Liability” from the list of account types. Enter the name of the loan, the amount of the loan and the interest rate in the appropriate fields. Choose whether the interest is to be paid monthly or at another interval. Enter the date that the loan was taken out in the “As Of” field.
Select Make General Journal Entries
1. Log in to your QuickBooks company file as an administrator.
2. Select “Lists” from the “Lists” drop-down menu.
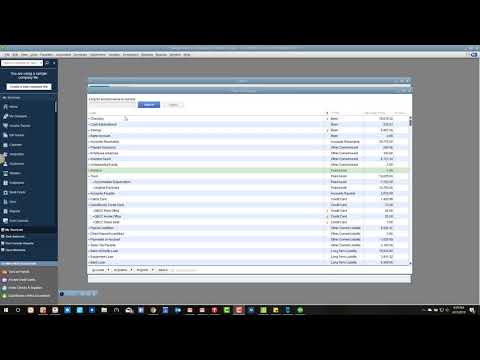
3. Select “Chart of Accounts” from the sub-menu that appears.
4. Double-click on the account you want to use for the loan in the resulting window. This will bring up the account details screen.
5. Select the “Use Undeposited Funds” check box in the “Payment Methods” section of the screen.
6. Click on the “OK” button to save your changes and close the window.
7. Select “Accounting” from the “Lists” drop-down menu again.
8. Click on “Make General Journal Entries” from the sub-menu that appears.
9. Enter the date of the loan in the “Date” field at the top of the resulting screen
Enter the date of the loan in the Date field
If you received the loan on January 1, 2019, you would enter 01/01/2019 in the Date field. If you do not see the Date field, click View Register from the toolbar at the top of the window to display it.
In the first line of the journal entry, select the Accounts Receivable account from the Account drop-down menu. If you do not have an Accounts Receivable account set up, select Undeposited Funds.
In the second line of the journal entry, enter the loan amount in the Debit column.
In the third line of the journal entry, select the Accounts Payable account from the Account drop-down menu. If you do not have an Accounts Payable account set up, select Undeposited Funds.
In the fourth line of the journal entry, enter the loan amount in the Credit column.
Enter the amount of the loan in the Debit column
To enter a loan into QuickBooks, you’ll need to debit the amount of the loan in the Debit column and credit the same amount in the Credit column. In the memo field, you’ll want to include the name of the lender and the purpose of the loan.
In the second line of the journal entry, select the appropriate income account from the Account drop-down menu. For example, if you are setting up a loan for a new car, you would select the “Auto Loans” account. If you are unsure which account to select, consult your accountant or QuickBooks support.
Enter the amount of the loan in the Credit column
Assuming that you have already set up your loan account in QuickBooks, to enter the amount of the loan, simply:
1. Click Enter Transactions
2. Select Loan from the list of transaction types
3. Enter the date of the loan in the date field
4. Enter the amount of the loan in the Credit column
5. Enter a description of the loan (optional)
6. Click Save & Close
Click Save & Close
To enter a loan into Quickbooks, you’ll need to first create a loan account. To do this, go to the Quickbooks menu and click on “Create New.” Then, select “Loan Account” from the options that appear.
Once you’ve done this, you’ll need to enter some basic information about the loan, such as the name of the lender, the loan amount, and the interest rate. Once you’ve entered this information, click on “Save & Close.”
Now, you’ll need to create a journal entry to record the loan in Quickbooks. To do this, go to the Quickbooks menu and click on “Create New.” Then, select “Journal Entry” from the options that appear.
In the journal entry, you’ll need to enter the date of the loan, the name of the lender, and the amount of the loan. You’ll also need to indicate whether the loan is for an asset or for a liability. To do this, click on the “Asset” or “Liability” tab at the top of the journal entry form.
Finally, click on “Save & Close.”