How to Add a Credit Card to Your iPhone
Contents
If you’re like many people, you probably use your iPhone for just about everything. That includes keeping track of your finances. So, if you’re looking for a quick and easy way to add a credit card to your iPhone, here’s a step-by-step guide.
Checkout this video:
Open the Settings app.
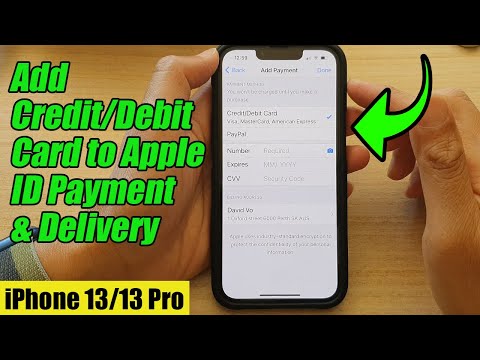
Open the Settings app . Tap Wallet & Apple Pay. If you’re using iOS 11.2 or earlier, tap Wallet. Tap Add Credit or Debit Card. Follow the steps to add a new card. If you’re asked to add the card that you use with your Apple ID, cards on other devices, or cards that you’ve recently removed, choose them, then enter the card security codes.
Tap “Wallet & Apple Pay.”
To add a credit or debit card to your iPhone, open the Settings app and tap “Wallet & Apple Pay.” Then, tap “Add Credit or Debit Card” and use your iPhone’s camera to scan your card. You can also enter the information manually.
Tap “Add Credit or Debit Card.”
You can use Apple Pay to make purchases in stores, in apps, and on the web. Before you can add a credit or debit card to Apple Pay, make sure that your iPhone is running the latest version of iOS.
To add a credit or debit card:
1. Open the Wallet app and tap .
2. Tap “Add Credit or Debit Card.”
3. Use your iPhone camera to capture your card information or enter it manually. If you need to, tap to switch between the front and back of your card.
4. Tap “Next,” then review your information and tap “Done.”
Use your camera to capture your card information or enter it manually.
If you have an iPhone 8 or later, you can add your credit card to your iPhone using Apple Pay. With Apple Pay, you can use your iPhone to pay in stores, in apps, and on websites.
If you have an iPhone 7 or earlier, you can add your credit card to your iPhone by taking a photo of your card.
Follow the instructions on the screen.
1. Open the Wallet app.
2. Tap the “+” sign in the upper-right corner.
3. Tap “Add Credit or Debit Card.”
4. Use your camera to enter your card information or enter it manually.
5. Follow the instructions on the screen to add your billing information.
6. Tap “Next.”
7. Choose whether you want to receive Apple ID-related emails from this card issuer, then tap “Agree.”
8. Tap “Done.”